Re: No power to fuse on RaspberryJAMMA board
Posted: Mon Jul 22, 2019 1:32 am
The white screen issue was fixed by replacing the video sync chip. The sync chip is surface mounted which I do not have the skill to solder on a new one. Even so, it is surrounded by through holes which can also be used. I cut off the legs of the bad chip with an xacto knife.
I ordered a more traditional version of it off eBay which has pin legs on it. The version I ordered had pins too wide to big to be mounted to the arpicade board, so I installed a socket which fits into the through holes but allows for larger pin chips to be placed into it.
After all that and waiting 3 weeks for the chip to arrive from China, I now have a fully functioning arpicade board!
I've attached some pictures below of the project and what I did to fix the fuse and video sync chip issues. The moral of the story here is always check your voltages before hooking up new hardware. What was fine for what was already in there may not be fine for what you are putting in there.
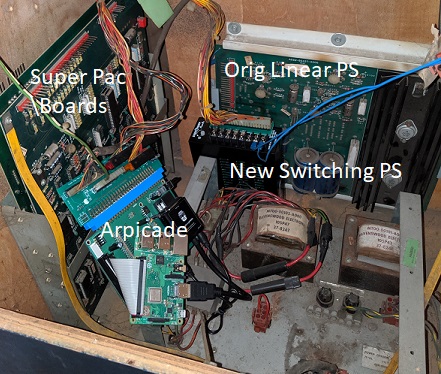
The original setup to put into my Super Pac-Man cabinet looked like this:
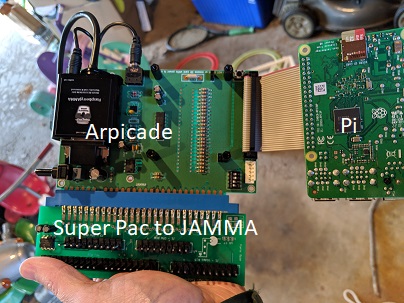
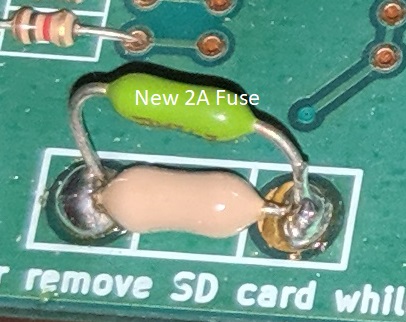
The power supply in Super Pac turned out to likely have too high voltage on the -5V for the Arpicade and Pi. The fuse blew on the Arpicade board and the Pi actually eventually stopped working too. I could not adjust the power down enough to feel confident, so I installed a new Super-Pac compatible switching power supply in the cabinet. Then I installed a new 2A fuse to replace the blown one. I didn't take out the old fuse, I just soldered a new one to it.
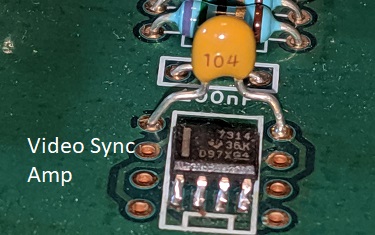
At this point the board powered up and sounds worked, but the games played blind with a white screen. The next step was to replace the video sync / amp chip. Being a tiny surface mounted chip, I instead installed a DIP8 adapted version of it after removing the mounted chip.
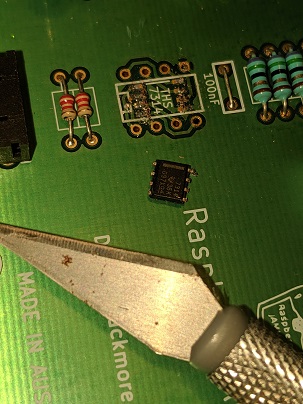
Here are the chip and a capacitor (unnecessary to use) before I removed it.
I desoldered the capacitor, then cut off the chip's legs with an xacto knife and then later used a soldering iron to 'wipe away' the parts of the chip legs still attached to the board's pads. I didn't have the tools to desolder surface mounted and didn't need to save the chip, so this was good enough.
That's when I found out the new chip on the left had pins too wide to fit through the board or into another socket I had to use.
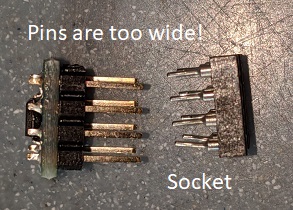
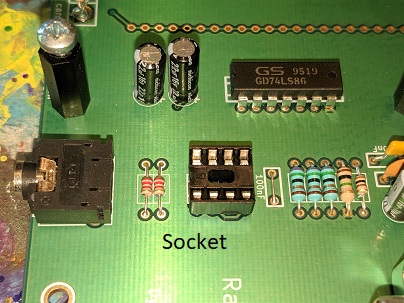
I ordered a new socket that allowed for variable width pins, and soldered it to the board where the surface mounted chip used to be.
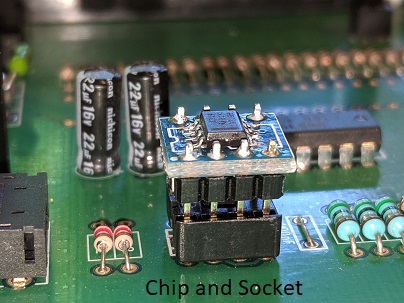
Now put the new chip in the socket...
Reconnect everything and fire it up...
Success!
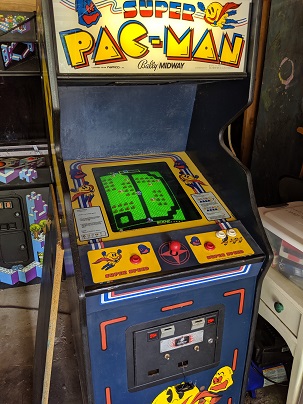
Best of all, the original Super Pac is 100% preserved and is only a few cable switches away from being active again.
I ordered a more traditional version of it off eBay which has pin legs on it. The version I ordered had pins too wide to big to be mounted to the arpicade board, so I installed a socket which fits into the through holes but allows for larger pin chips to be placed into it.
After all that and waiting 3 weeks for the chip to arrive from China, I now have a fully functioning arpicade board!
I've attached some pictures below of the project and what I did to fix the fuse and video sync chip issues. The moral of the story here is always check your voltages before hooking up new hardware. What was fine for what was already in there may not be fine for what you are putting in there.
The original setup to put into my Super Pac-Man cabinet looked like this:
The power supply in Super Pac turned out to likely have too high voltage on the -5V for the Arpicade and Pi. The fuse blew on the Arpicade board and the Pi actually eventually stopped working too. I could not adjust the power down enough to feel confident, so I installed a new Super-Pac compatible switching power supply in the cabinet. Then I installed a new 2A fuse to replace the blown one. I didn't take out the old fuse, I just soldered a new one to it.
At this point the board powered up and sounds worked, but the games played blind with a white screen. The next step was to replace the video sync / amp chip. Being a tiny surface mounted chip, I instead installed a DIP8 adapted version of it after removing the mounted chip.
Here are the chip and a capacitor (unnecessary to use) before I removed it.
I desoldered the capacitor, then cut off the chip's legs with an xacto knife and then later used a soldering iron to 'wipe away' the parts of the chip legs still attached to the board's pads. I didn't have the tools to desolder surface mounted and didn't need to save the chip, so this was good enough.
That's when I found out the new chip on the left had pins too wide to fit through the board or into another socket I had to use.
I ordered a new socket that allowed for variable width pins, and soldered it to the board where the surface mounted chip used to be.
Now put the new chip in the socket...
Reconnect everything and fire it up...
Success!
Best of all, the original Super Pac is 100% preserved and is only a few cable switches away from being active again.